Angular 2 JavaScript 环境配置
本章节我们为大家介绍如何配置 Angular 2 的执行环境。
本章节使用的是 JavaScript 来创建 Angular 的应用,当然你也可以使用 TypeScript 和 Dart 来创建 Angular 应用 。
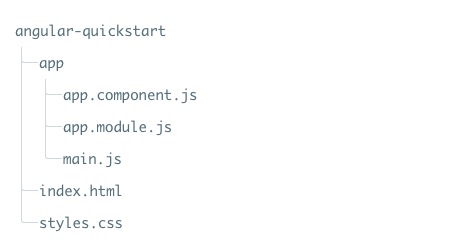
本章节使用到的文件目录结构如下所示:
创建配置文件
创建目录
									$ mkdir angular-quickstart
$ cd angular-quickstart
载入需要的库
这里我们推荐使用 npm 来作为包的管理工具,如果你还没安装npm或者不了解 npm 可以查看我们的教程:
NPM 使用介绍
。
创建 package.json 文件,代码如下所示:
package.json 文件:
{
"
name
"
:
"
angular2-quickstart
"
,
"
version
"
:
"
1.0.0
"
,
"
scripts
"
:
{
"
start
"
:
"
npm run lite
"
,
"
lite
"
:
"
lite-server
"
}
,
"
license
"
:
"
ISC
"
,
"
dependencies
"
:
{
"
@angular/common
"
:
"
2.0.0
"
,
"
@angular/compiler
"
:
"
2.0.0
"
,
"
@angular/core
"
:
"
2.0.0
"
,
"
@angular/forms
"
:
"
2.0.0
"
,
"
@angular/http
"
:
"
2.0.0
"
,
"
@angular/platform-browser
"
:
"
2.0.0
"
,
"
@angular/platform-browser-dynamic
"
:
"
2.0.0
"
,
"
@angular/router
"
:
"
3.0.0
"
,
"
@angular/upgrade
"
:
"
2.0.0
"
,
"
core-js
"
:
"
^2.4.1
"
,
"
reflect-metadata
"
:
"
^0.1.3
"
,
"
rxjs
"
:
"
5.0.0-beta.12
"
,
"
zone.js
"
:
"
^0.6.23
"
,
"
angular2-in-memory-web-api
"
:
"
0.0.20
"
,
"
bootstrap
"
:
"
^3.3.6
"
}
,
"
devDependencies
"
:
{
"
concurrently
"
:
"
^2.0.0
"
,
"
lite-server
"
:
"
^2.2.0
"
}
}
由于 npm 官网镜像国内访问太慢,这里我使用了淘宝的npm镜像,安装方法如下:
$ npm install -g cnpm --registry=https://registry.npmmirror.com
执行后我们就可以使用 cnpm 命令来安装模块:
$ cnpm install
执行成功后,angular-quickstart 目录下就会生成一个 node_modules 目录,这里包含了我们这个实例需要的模块。
创建 Angular 组件
组件(Component)是构成 Angular 应用的基础和核心,一个组件包装了一个特定的功能,并且组件之间协同工作以组装成一个完整的应用程序。
一般来说,一个组件就是一个用于控制视图模板的JavaScript类。
接下来我们在 angular-quickstart 创建一个 app 的目录:
											$ mkdir app
$ cd app
并添加组件文件 app.component.js ,内容如下:
app.component.js 文件:
(
function
(
app
)
{
app
.
AppComponent
=
ng
.
core
.
Component
(
{
selector
:
'
my-app
'
,
template
:
'
<h1>我的第一个 Angular 应用</h1>
'
}
)
.
Class
(
{
constructor
:
function
(
)
{
}
}
)
;
}
)
(
window
.
app
||
(
window
.
app
=
{
}
)
)
;
接下来我们来分析下以上代码:
我们通过链式调用全局Angular core命名空间ng.core中的Component和Class方法创建了一个名为AppComponent的可视化组件。
Component方法接受一个包含两个属性的配置对象,Class方法是我们实现组件本身的地方,在Class方法中我们给组件添加属性和方法,它们会绑定到相应的视图和行为。
模块
Angular应用都是模块化的,ES5没有内置的模块化系统,可以使用第三方模块系统,然后我们为应用创建独立的命名空间 app,文件代码可以包裹在 IIFE(立即执行函数表达式)中:
											(function(app) {
})(window.app || (window.app = {}));
我们将全局app命名空间对象传入IIFE中,如果不存在就用一个空对象初始化它。
大部分应用文件通过在app命名空间上添加东西来输出代码,我们在app.component.js文件中输出了AppComponent。
app.AppComponent =
Class定义对象
本实例中AppComponent类只有一个空的构造函数:
											.Class({
    constructor: function() {}
});
当我们要创建一个是有实际意义的应用时,我们可以使用属性和应用逻辑来扩展这个对象。
Component 定义对象
ng.core.Component()告诉Angular这个类定义对象是一个Angular组件。传递给ng.core.Component()的配置对象有两个字段:selector和template。
ng
.
core
.
Component
(
{
selector
:
'
my-app
'
,
template
:
'
<h1>我的第一个 Angular 应用</h1>
'
}
)
selector 为一个宿主HTML元素定义了一个简单的CSS选择器my-app。当Angular在宿主HTML中遇到一个my-app元素时它创建并显示一个AppComponent实例。
template 属性容纳着组件的模板。
添加 NgModule
Angular 应用由 Angular 模块组成,该模块包含了 Angular 应用所需要的组件及其他任何东西。
接下来我们创建 app/app.module.js 文件,内容如下:
app.module.js 文件:
(
function
(
app
)
{
app
.
AppModule
=
ng
.
core
.
NgModule
(
{
imports
:
[
ng
.
platformBrowser
.
BrowserModule
]
,
declarations
:
[
app
.
AppComponent
]
,
bootstrap
:
[
app
.
AppComponent
]
}
)
.
Class
(
{
constructor
:
function
(
)
{
}
}
)
;
}
)
(
window
.
app
||
(
window
.
app
=
{
}
)
)
;
启动应用
添加 app/main.js 文件:
app/main.js 文件:
(
function
(
app
)
{
document
.
addEventListener
(
'
DOMContentLoaded
'
,
function
(
)
{
ng
.
platformBrowserDynamic
.
platformBrowserDynamic
(
)
.
bootstrapModule
(
app
.
AppModule
)
;
}
)
;
}
)
(
window
.
app
||
(
window
.
app
=
{
}
)
)
;
我们需要两样东西来启动应用:
-
Angular 的 platformBrowserDynamic().bootstrapModule 函数。
-
上文中提到的应用根模块 AppModule。
接下来创建 index.html,代码如下所示:
index.html 文件:
<
html
>
<
head
>
<
meta
charset
=
"
utf-8
"
>
<
title
>
Angular 2 实例 - 云搜索MX教程(yssmx.com)
</
title
>
<
meta
name
=
"
viewport
"
content
=
"
width=device-width, initial-scale=1
"
>
<
link
rel
=
"
stylesheet
"
href
=
"
styles.css
"
>
<
script
src
=
"
node_modules/core-js/client/shim.min.js
"
>
</
script
>
<
script
src
=
"
node_modules/zone.js/dist/zone.js
"
>
</
script
>
<
script
src
=
"
node_modules/reflect-metadata/Reflect.js
"
>
</
script
>
<
script
src
=
"
node_modules/rxjs/bundles/Rx.js
"
>
</
script
>
<
script
src
=
"
node_modules/@angular/core/bundles/core.umd.js
"
>
</
script
>
<
script
src
=
"
node_modules/@angular/common/bundles/common.umd.js
"
>
</
script
>
<
script
src
=
"
node_modules/@angular/compiler/bundles/compiler.umd.js
"
>
</
script
>
<
script
src
=
"
node_modules/@angular/platform-browser/bundles/platform-browser.umd.js
"
>
</
script
>
<
script
src
=
"
node_modules/@angular/platform-browser-dynamic/bundles/platform-browser-dynamic.umd.js
"
>
</
script
>
<
script
src
='
app
/
app
.
component
.
js
'
>
</
script
>
<
script
src
='
app
/
app
.
module
.
js
'
>
</
script
>
<
script
src
='
app
/
main
.
js
'
>
</
script
>
</
head
>
<
body
>
<
my-app
>
Loading...
</
my-app
>
</
body
>
</
html
>
index.html 分析
-
1、载入我们需要的JavaScript库;
-
2、载入我们自己的JavaScript文件,注意顺序;
-
3、我们在<body>标签中添加<my-app>标签。
执行过程为:当 Angular 在 main.js 中调用 bootstrapModule 函数时,它读取 AppModule 的元数据,在启动组件中找到 AppComponent 并找到 my-app 选择器,定位到一个名字为 my-app 的元素,然后在这个标签之间的载入内容。
添加一些样式
styles.css 文件代码为:
styles.css 文件:
h1
{
color:
#369
;
font-family:
Arial
,
Helvetica
,
sans-serif
;
font-size:
250
%
;
}
body
{
margin:
2
em
;
}
打开终端,输入以下命令:
$ npm start
访问 http://localhost:3000/,浏览器显示结果为:
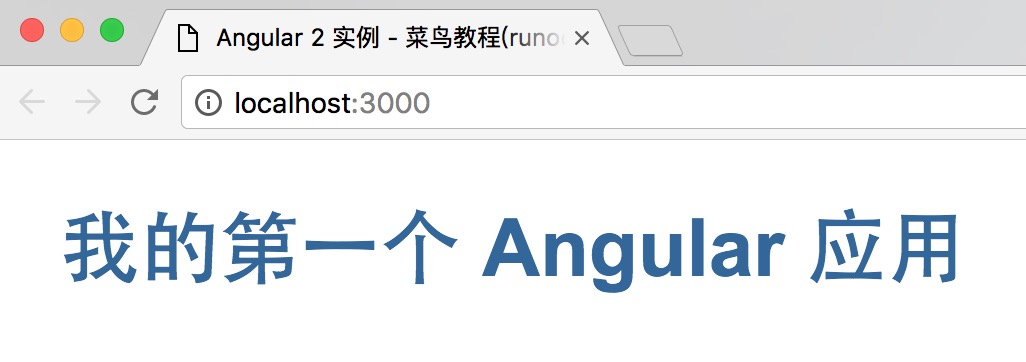
这样我们的第一个 Angular2 的应用就算创建完成了,本文所使用的源码可以通过以下方式下载,不包含 node_modules。
源代码下载